Linux
You can install Axon Server through the package manager integrated into your Linux distribution: APT on Debian and Debian-based distributions (such as Ubuntu), or DNF/YUM on RHEL-based distributions. Using this method will make it simple to update using commands as well.
|
The package currently supports Debian 12 (Bookworm) and 13 (Trixie), Ubuntu 22.04 (Jammy) and 24.04 (Noble Numbat), and RHEL 8, 9, and 10 (or compatible distributions, such as Rocky Linux and AlmaLinux). More distributions will be supported in the future. |
Step 1: Installation
Pick the tab that matches your distribution.
Requirements:
Before we can install Axon Server, we need to make sure that your system has the required dependencies to manage the AxonServer package repository.
The Debian instructions below apply to Debian and Debian-based distributions, such as Ubuntu, since Ubuntu uses the same APT package manager.
-
Debian
-
RHEL 9 / RHEL 10
-
RHEL 8
sudo apt install ca-certificates lsb-release curlsudo dnf install -y dnf-utilssudo yum install -y yum-utilsSigning key: All artifacts are signed with a private key, that the package manager will verify upon installation. It does this for you, so you can be sure the software you install is trusted.
-
Debian
-
RHEL 9 / RHEL 10
-
RHEL 8
The following command imports our public key for this verification.
sudo curl https://pkg.axoniq.io/axoniq.pub -o /etc/apt/trusted.gpg.d/axoniq.ascThe signing key is referenced automatically from the repository configuration file added in the next step, so no separate step is required here.
The signing key is referenced automatically from the repository configuration file added in the next step, so no separate step is required here.
Repository: Next, we have to add the repository that houses our artifacts. The repository provides two release channels for Axon Server and the Axon Server CLI:
-
main: the latest Axon Server and Axon Server CLI releases. -
LTS: the latest Long-Term Support (LTS) stable releases.
You can pick either channel, and switch between them later on.
-
Debian
-
RHEL 9 / RHEL 10
-
RHEL 8
Choose the channel you want to use.
-
main
-
LTS
echo "deb [arch=all signed-by=/etc/apt/trusted.gpg.d/axoniq.asc] https://pkg.axoniq.io/apt $(. /etc/os-release && echo "$VERSION_CODENAME") main" | sudo tee /etc/apt/sources.list.d/axoniq.list > /dev/nullecho "deb [arch=all signed-by=/etc/apt/trusted.gpg.d/axoniq.asc] https://pkg.axoniq.io/apt $(. /etc/os-release && echo "$VERSION_CODENAME") LTS" | sudo tee /etc/apt/sources.list.d/axoniq.list > /dev/nullYou can switch channels at any time by editing /etc/apt/sources.list.d/axoniq.list, replacing main with LTS (or vice versa), and running sudo apt-get update.
sudo yum-config-manager --add-repo https://pkg.axoniq.io/rhel/axonserver.repoThis repository file defines both channels as separate repositories, axonserver (main) and axonserver-lts (LTS), with the LTS channel enabled by default.
To switch channels, enable one repository and disable the other:
main channelsudo dnf config-manager --set-enabled axonserver
sudo dnf config-manager --set-disabled axonserver-ltsLTS channel (default)sudo dnf config-manager --set-enabled axonserver-lts
sudo dnf config-manager --set-disabled axonserversudo yum-config-manager --add-repo https://pkg.axoniq.io/rhel/axonserver.repoThis repository file defines both channels as separate repositories, axonserver (main) and axonserver-lts (LTS), with the LTS channel enabled by default.
To switch channels, enable one repository and disable the other:
main channelsudo yum-config-manager --enable axonserver
sudo yum-config-manager --disable axonserver-ltsLTS channel (default)sudo yum-config-manager --enable axonserver-lts
sudo yum-config-manager --disable axonserverRepository file content (RHEL)
The repository configuration file (axonserver.repo) added above contains:
[axonserver]
name=Axonserver for RHEL/CentOS $releasever
baseurl=https://pkg.axoniq.io/rhel/$releasever
enabled=0
gpgcheck=1
gpgkey=https://pkg.axoniq.io/axoniq.pub

[axonserver-lts]
name=Axonserver LTS for RHEL/CentOS $releasever
baseurl=https://pkg.axoniq.io/rhel/$releasever/LTS
enabled=1
gpgcheck=1
gpgkey=https://pkg.axoniq.io/axoniq.pub
Install: We are ready for the installation!
-
Debian
-
RHEL 9 / RHEL 10
-
RHEL 8
sudo apt-get update
sudo apt-get install axonserver
sudo dnf -y install axonserverTo also install the Axon Server CLI:
sudo dnf -y install axonserver-clisudo yum -y install axonserverTo also install the Axon Server CLI:
sudo yum -y install axonserver-cliStep 2: Configure
Axon Server runs with adequate defaults.
However, you can customize it by editing the /etc/axonserver/axonserver.properties file that was just installed on your machine.
The Axon Server dashboard runs on port 8024 by default, while the gRPC port for Axon Framework clients is 8124. You can tweak this by editing the properties:
server.port=8024                       # Dashboard port
axoniq.axonserver.port=8124            # gRPC port for Axon Framework clients
axoniq.axonserver.internal-port=8224   # gRPC port for cluster communication
A full list of properties can be found in the configuration reference.
| If you want your Axon Server to be accessible from other machines, you need to add additional settings so machines know where to find each other. For more information, see the hosts and connections. |
Step 3: Axoniq Console (optional)
To unlock additional functionality, connect your Axon Server to Axoniq Console.
Why connect to Axoniq Console?
By connecting your Axon Server to Axoniq Console, you will be able to:
-
Automatic initialization and clustering of Axon Server instances
-
Create multiple contexts in Axon Server to organize your applications
-
Inspect the status of your Axon Server through Axoniq Console
-
Get deep insights into the status and performance of your applications when also connected to Axoniq Console
-
Create multiple users and Access token in Axon Server
In contrast, without connecting to Axoniq Console, you can:
-
Only have one context in Axon Server
-
Only have one user and one access key in Axon Server
Obtaining Axoniq Console access token
You can obtain the console access token by following these steps:
-
Log into Axoniq Console.
-
If this is your first time logging in, you will be prompted to enter your name. After this, your own Workspace will be created automatically
-
Go to the Axon Server page via the left menu
-
In the sidebar on the right, click "Manage access tokens" to open access token management
-
Click the button under "Show Token" to reveal your unique access token
Setting the access token
Now you have the access token, you can set it in the axonserver.properties file.
Add the following line to the file:
axoniq.console.authentication=<your-access-token>Step 4: Run Axon Server
You can now start Axon Server! You can use Systemd if your system uses it:
sudo systemctl start axonserverOr, alternatively, you can run it manually:
sudo -i -u axonserver
cd /var/lib/axonserver/
sh start-axonserver.sh
Step 5: Initialize
If you chose not to use Axoniq Console, you will be prompted to initialize Axon Server when visiting the Axon Server dashboard. If you used Axoniq Console, you can skip this step and Axon Server is immediately ready for use.
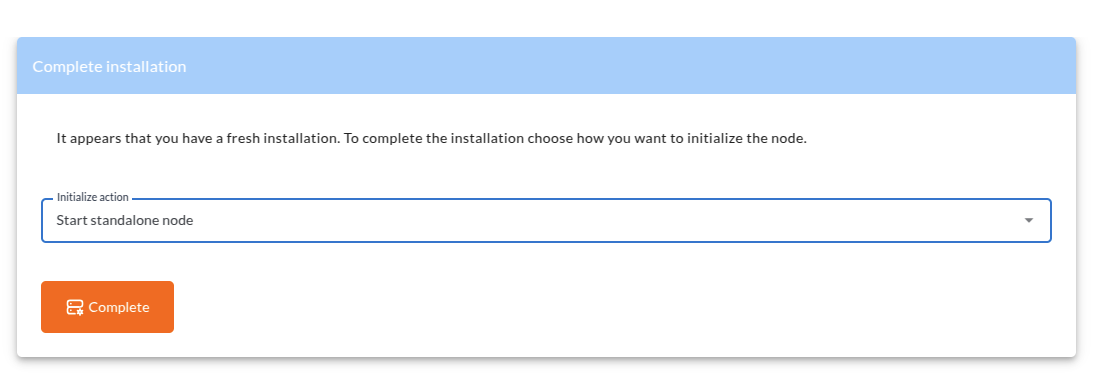
Please choose the Start standalone node edition and click Complete. You are now ready to use Axon Server.
|
To initialize Axon Server as standalone node without a UI action, you can also set
the |
Next steps
The steps in this guide do not take into account any security, authentication or authorization. If you would like to set this up, please follow the Securing Axon Server guide.
Ready to connect
Now that you have Axon Server running, you can start using it with your Axon Framework applications. If you run on the same computer and the default ports, your Axon Framework application should be able to connect to Axon Server without any additional configuration.
If you modified the port or hostname, you need to configure Axon Framework to connect to Axon Server.
For Spring Boot, you can do this by adding the following properties to your application.properties file:
axon.axonserver.servers=YOUR_HOST:YOUR_PORT