Clusters
| This feature is part not supported in the Developer plan |
Introduction
Axon Server can be deployed as a cluster to guarantee high availability. A cluster of Axon Server nodes will provide multiple connection points for (Axon Framework-based) client applications, and thus share the load of managing message delivery and event storage. Client applications will dynamically connect to a node in the cluster and automatically reconnect to another, should the node that they are currently connected to become unreachable.
An Axon Server EE cluster has 3 main areas of administration,
-
Cluster Nodes - "Instances" of Axon Server that need to be part of the cluster.
-
Replication Groups - Responsible for event data replication and transaction management between the various nodes of a cluster.
-
Contexts - Responsible for event storage within the various nodes of a cluster.
A visual representation of the relationship between the 3 is shown below.
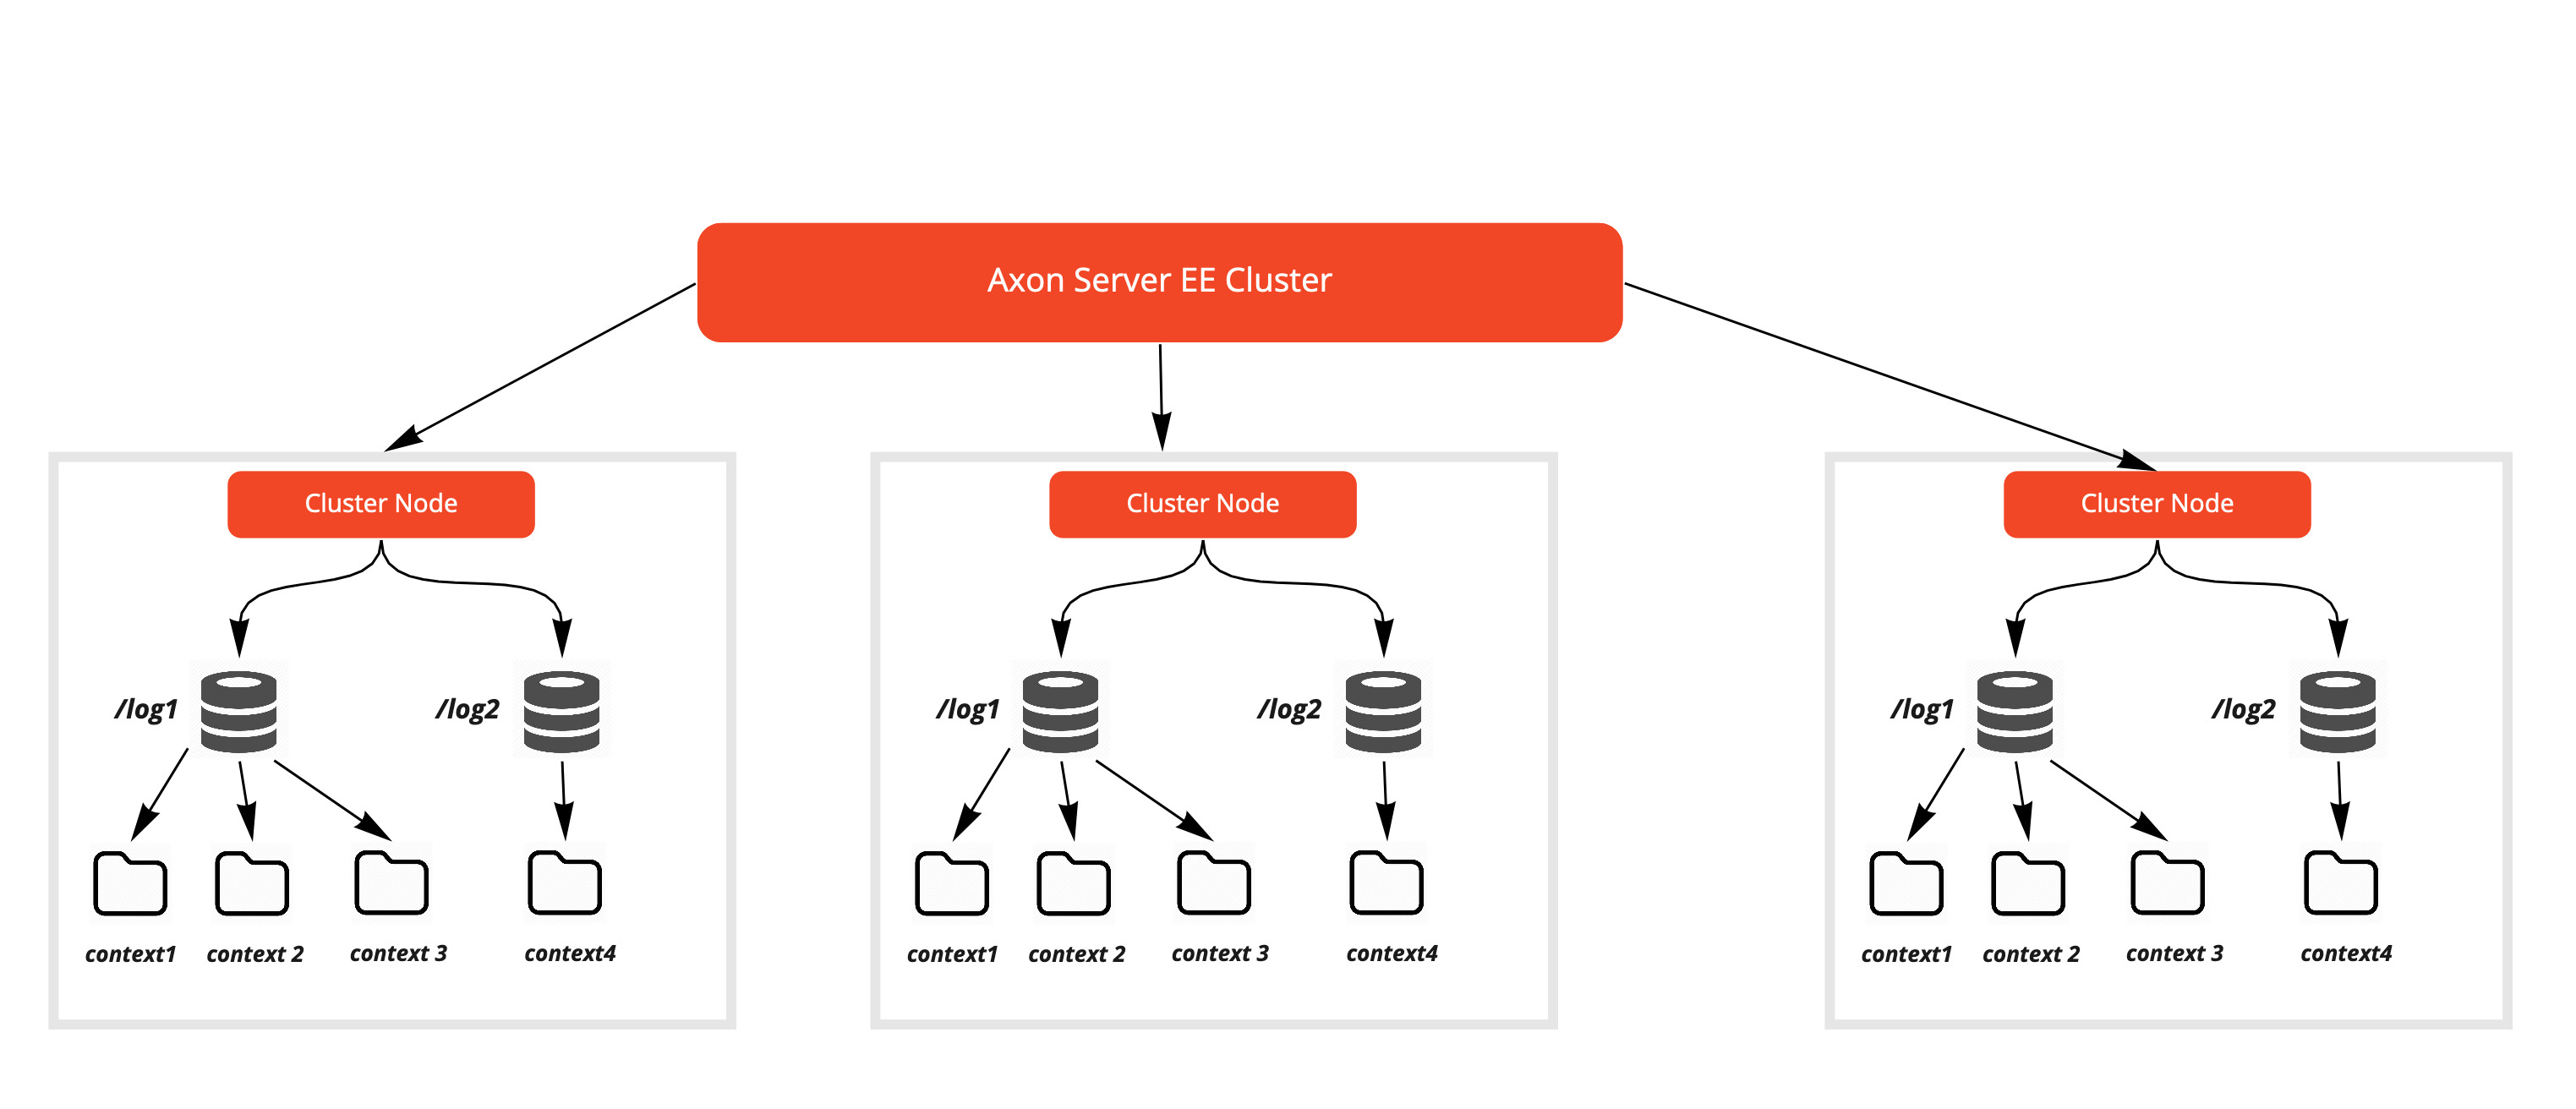
Network requirements
Each Axon Server node in a cluster must be individually addressable, both by client applications and by the other nodes in the cluster. Placing all nodes behind a single shared load balancer or ingress host for the gRPC ports will break the cluster.
There are two reasons for this requirement. First, the nodes within a cluster use the RAFT consensus protocol to coordinate replication and elect leaders. RAFT requires point-to-point communication with a specific peer, so traffic that is forwarded to an arbitrary node by a shared load balancer is delivered to the wrong destination. Second, client applications connect to any node in the cluster to discover where they should connect for a specific context. The server responds with the hostname and port of a specific node, and the client reconnects to that address. If that address routes back through a shared load balancer, the client may end up on a different node than the one selected, with broken context routing as a result.
To support both kinds of traffic, each node advertises two distinct addresses.
The property axoniq.axonserver.hostname (optionally combined with axoniq.axonserver.domain) defines the address advertised to clients on the gRPC port (default 8124).
The property axoniq.axonserver.internal-hostname (optionally combined with axoniq.axonserver.internal-domain) defines the address advertised to other nodes on the internal gRPC port (default 8224).
Both addresses must resolve to the node that advertises them, from every party that uses them, and each node must be reachable on its own port pair.
Depending on the deployment target, this typically means:
-
In Kubernetes, expose the nodes through a headless
Service(clusterIP: None), per-podServices, per-podNodePorts, or per-pod ingress hosts. A single ingress with a shared host fronting all replicas does not work for the gRPC ports. -
On VMs behind a load balancer, provision per-node DNS records, or distinct load balancer listeners with per-node ports, rather than a single shared address that round-robins across nodes.
-
In environments with split-horizon DNS, ensure that each advertised hostname resolves to the same node from every perspective (clients, peers, and the node itself).
When TLS is enabled and the client-facing hostname differs from the internal hostname, separate certificates are required.
See SSL for the dedicated internal-cert-chain-file, internal-private-key-file, and internal-trust-manager-file settings.
Setup process
The cluster setup process always begins by designating any one clean/uninitialized Axon Server EE node as the first member of the cluster. You can then run the "init-cluster" command on it which will create the following replication groups and contexts -> admin/default.
From thereon, there are multiple ways to continue the setup depending upon your Event Store deployment topology.
-
Any other Axon Server node can be added to the cluster using the "register-node" command without associating it with any Replication Group / Context.
-
New Replication Groups/Contexts can be added and cluster member nodes can be associated with these.
-
Member nodes can be removed from the cluster at any point of time.
Axon provides two ways for automating cluster configuration. The first is the Automatic Initialization feature and the other is the Cluster Template feature.
Automatic initialization
The manual process of member registration of the cluster can be bypassed by setting a couple of properties in the axonserver.properties file.
axoniq.axonserver.autocluster.first=internal-hostname:internal-port axoniq.axonserver.autocluster.contexts=context1,context2
The axoniq.axonserver.autocluster.first property defines the first node in the cluster, by specifying its internal hostname (the hostname used by other Axon Server nodes to connect to this host), and the internal port. If the internal port is default (8224) it can be omitted.
axoniq.axonserver.autocluster.contexts defines the contexts to create on the first node and the context to join for the other nodes. All of these contexts will be joined as primary nodes. When you don’t specify any contexts, the initial node will only create an admin context, the other nodes will join the cluster, but not be a member of any contexts.
The autocluster properties will only take effect on a clean start of a node. If a node is already initialized, it will not create any contexts anymore, nor join the cluster again.
Cluster templates
The cluster template is defined as a YAML file, describing a cluster’s configuration. It is possible to predefine replication groups, contexts, metadata, applications (with tokens), and users (with their roles), so that the configuration can be shared across teams.
| The cluster template runs exactly once, on the first clean Axon Server start-up, if there is no previous cluster configuration defined. Therefore, the cluster template will not override any existing configuration. Its purpose is to be used during active development, to be able to share the configuration across development teams. |
Usage
To use the cluster template feature, all you need to do is define a valid cluster template YAML file. If this file is present on a fresh Axon Server startup, it will automatically be picked up and the cluster will be configured accordingly.
| Each cluster node needs to have the cluster template YAML file copy. Each node will read this file, find its own configuration and configure itself. |
Default path from which Axon Server reads configuration is ./cluster-template.yml
You can override this path anytime by setting Axon Server property: axoniq.axonserver.clustertemplate.path:/mypath/cluster-template.yml
Configuration
Below you can find an example of a basic cluster setup: the _admin and default contexts are in separate replication nodes, replicated across all nodes that are marked as primary.
axoniq:
  axonserver:
    cluster-template:
      first: internal-hostname:internal-port
      replicationGroups:
      - name: _admin
        roles:
        - node: axonserver-1
          role: PRIMARY
        - node: axonserver-2
          role: PRIMARY
        - node: axonserver-3
          role: PRIMARY
        contexts:
        - name: _admin
      - name: default
        roles:
        - node: axonserver-2
          role: PRIMARY
        - node: axonserver-3
          role: PRIMARY
        - node: axonserver-1
          role: PRIMARY
        contexts:
        - name: default
      applications: []
      users: []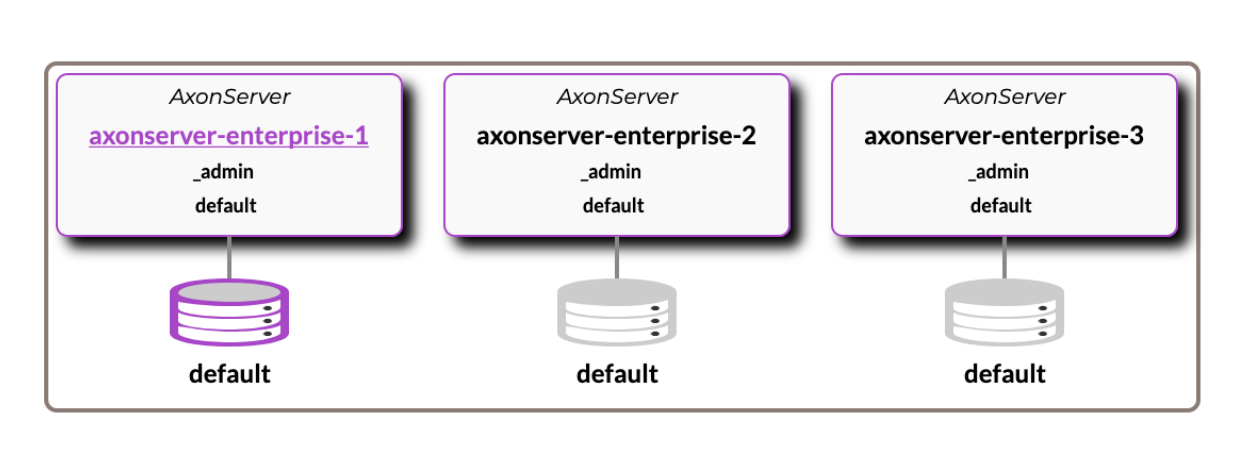
Cluster overview after default configuration is applied
Export
In order to avoid mistakes while writing a cluster configuration file, we have implemented an export button that will generate a cluster template file based on current setup.
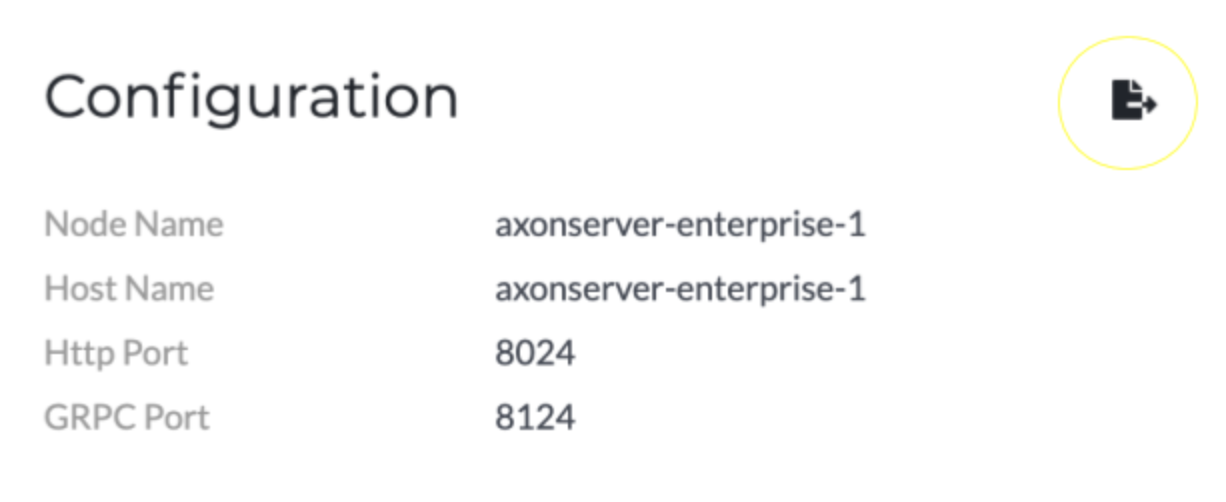
Location of export button at Settings page
Recommended mechanism - Creating an advanced cluster setup
-
Start a fresh Axon Server setup (use basic cluster template setup mentioned above).
-
Configure a cluster via the UI, by creating users, applications, replication groups and contexts.
-
Use the export button located at "Settings -> Configuration" panel to download the current cluster configuration.
-
Replace the basic cluster template with the newly exported cluster template configuration.
Use export button from any admin node to ensure that the configuration file contains all the relevant information.